Summer season is here
With the weather getting warmer we are starting to see more cars with A/C issues. Here is a Peugeot RCZ […]
READ MORE -
Summary of the On Car Starting Test;
This is a brief summary of the tests that we’ll be carrying out to get to the bottom of what’s causing a no crank condition on your vehicle. With the tests that we’ll be carrying out you’ll be able to say with absolute certainty it is a bad starter motor or completely eliminate it as the cause of your vehicles problem. Although the tests are fairly simple, if you do them on your own and you find the root of the problem, then all we need to do is fix your problem and everything will be solved much, much quicker.
When you bring the car or vehicle to Widnes Auto electrical, these are some of the checks we run…
Where necessary we will bench test the starter motor. What does this test consist of. Firstly our engineers will clamp it down onto the working bench, get a battery or a charger and put the earth on the starting body. To test the solenoid we will check the spade terminal or the small nut on the solenoid; it should throw the gear forward (although the motor won’t spin whilst testing). To check the motor, we earth the main body again and quickly strike the large wire connected to the motor body, it will now spark and kick the started round.
Bring the vehicle down to our garage in Widnes and we’ll do all the necessary testing. If it’s faulty, we’ll either repair it or fit a new one for you. For your peace of mind we supply and repair 12v and 24v commercial starters and alternators
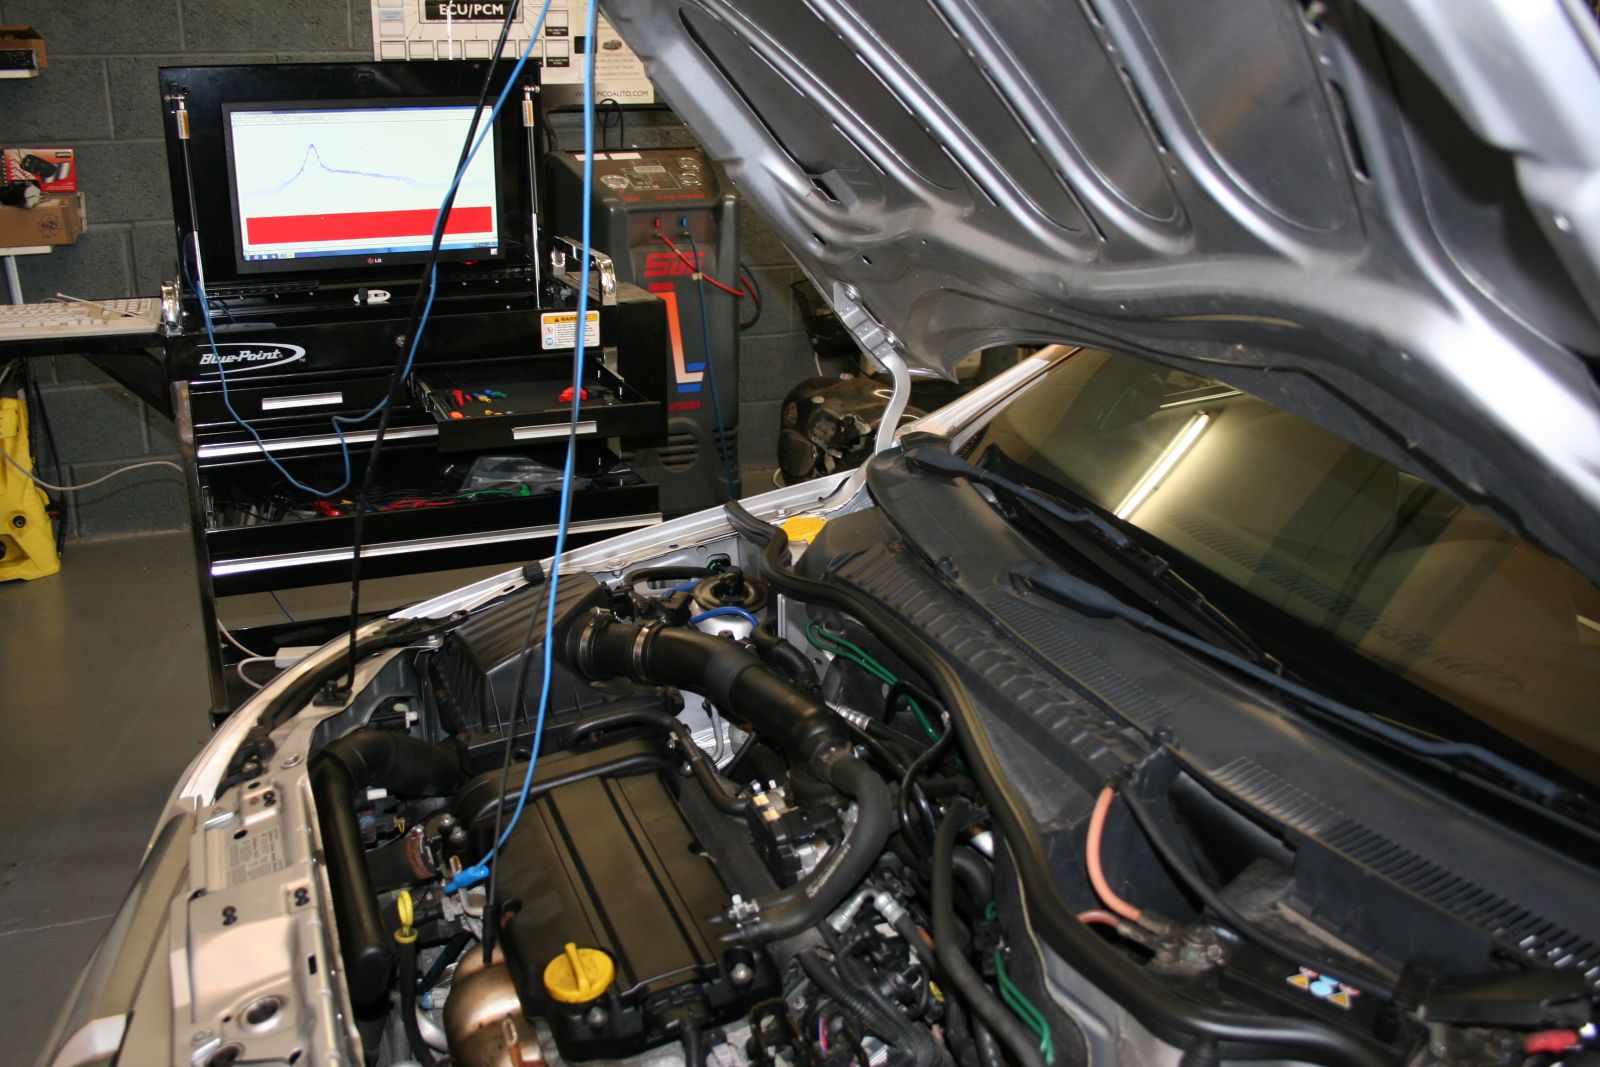
While driving turn on the A/C to maximum and put the system in recirculate mode (button has an orange light and an arrow bent back on itself). Within a minute or two the air from the vents should be noticeably chilly. If you have a digital thermometer at home, you may want to bring that along so you can measure the temperature of the air coming from the vents. The temperature should be around 6°C
Whilst you are having a look under the bonnet you can also check if the air conditioning compressor is working. With the engine running and the A/C is set to maximum and in recirculate mode, listen for a clicking noise accompanied by the engine revs rising or falling slightly. This is the compressor engaging and disengaging and is what you want to hear. You may need to turn the A/C on and off to make this occur on demand.
Lastly if you know little about cars, you should look out for the metal air conditioning pipes. You should be able to locate a thick pipe (low pressure) and a thinner pipe (which is high pressure). When the air conditioning has been running for a couple of minutes the thicker pipe should be nice and cool (almost frosty to the touch!). Be careful when putting your hands into the engine bay when the engine is running though! You don’t want to burn yourself or put your fingers into a spinning fan, as this would obviously hurt a lot!
If the testing for this has failed and you can’t notice the cooler/warmer air flowing through the car, your air conditioning may be faulty, which means you’ll need to get it repaired as quickly as possible (you don’t want to cook inside your car during the summer do you?). Here at Widnes Autoelectrics, we can repair and even fit a brand new air conditioning system if necessary, whatever the fault in your vehicle is, we will be able to help and we can offer a solution, whether that be a repair or a new system altogether. If you’re air conditioning has failed you due to it being faulty, bring your vehicle into us and we’ll fix it for you! To get into contact with us, please click here.
Plug in Diagnostics – What we do
When you bring your vehicle to us to check electrical faults we will inspect your cars on-board computer by plugging in our diagnostics tool. This will allow us to check the vehicles electronic control unit. This will enable us to identify any electrical faults that your car or vehicle has so that we can carry out the necessary repairs
For some vehicles we may need to monitor the electrics for up to a week to identify and download any faults your ECU was not able to pick up. More often than not, faults are down to simple coding errors that mean we can just reset the fault codes. However if further investigation and repairs are needed, we will keep you informed through the whole process so their are no nasty surprises in the car electrics repairs costs.
Typical types of work that we carry out for Electrical diagnostics checking for your vehicle
Battery, starter motor and associated wiring
Battery charging rate, current draw and alternator
Distributor assembly, cap, rotor arm and ignition timing variation
Ignition module operation & coil dwell function
Coil output together with spark duration
Spark plug and plug lead performance
Carburettor / injection duration
Exhaust gas measurements
Cylinder condition & relative compression testing
Fuel injection variation
Diesel engine Diagnostics
Battery, starter motor and associated wiring
Battery charge rate, current draw and alternator
Heater glow plug current draw, pre-glow timer check
Heater glow plug, post-glow timer check
Fuel injection pump operation
Fuel injection pump timing (where marks are available)
For your electrical Diagnostics, all of this is compiled to form a comprehensive A4 printout for you. This records the entire test, as carried out on your vehicle.
A small engine ignition includes the ignition controller (mechanical-breaker, capacitor-discharge or transistor-controlled), spark plugs, flywheel and wiring. Servicing the ignition system of your small engine depends on which types of components it has.
There are many different types of ignition systems, below are a few of them, along with a description of what they are.
Because the ignition is a very complex piece of machinery in your vehicle, it is sometimes difficult to locate the problem if it’s being faulty. If you don’t know much about servicing and repairing cars, do not attempt to fix it yourself, you may do something which will make the repairs cost more, or you may even harm yourself.
Instead of struggling to fix it yourself, why not get an expert to do it for you? Here at Widnes Autoelectrics, we have the experience, the know-how and the right tools to determine where the problem is and how we can fix it. Just get in touch with us here, to book an appointment or to find out a little more information about what we can do for you!

An alternator keeps your vehicle’s battery charged. It also provides power to operate your lights and other electronic accessories whilst your car is running.
Symptoms of a bad alternator
Symptoms of a bad alternator include hard or slow cranking when you try to start your vehicle, lights that seem too dim and of course the red BATT, ALT or GEN light glowing on the dash. But if the lights don’t come on the dash, that doesn’t mean you’re safe, you can have an alternator problem without the lights appearing, because it’s the alternator that makes the lights appear in the first place, so if it’s stopped working then no lights may show.
A properly functioning alternator
If your car starts and runs, or if the engine turns over normally when you try to start it but it won’t actually run, there is probably nothing wrong with your alternator, starter or battery. Which means your alternator is probably functioning properly.
Overcharging
The only exception is if the alternator is overcharging, in other words it’s putting out too much voltage. This can cause malfunctions to the vehicles computer, while the engine is running and causes all sorts of weird problems. An overcharging alternator can boil a battery dry, so if your battery gets low on electrolyte, making you add water to it, or if your car eats batteries, you may have an overcharging alternator.
Are you sure it’s the alternator?
Bad battery symptoms and bad starter symptoms can be very much like bad alternator symptoms. Make sure it’s the alternator before you come to us for it to be repaired/replaced or you may still have a problem on your hands. A properly operating alternator cannot charge a bad battery and a new fully charged battery can’t spin over a bad starter.
Alternator Testing
The best method of testing a bad alternator is with a voltmeter. Put a voltmeter across the battery whilst the engine is running. Voltage should be 14.2 volts. Any lower than 14 volts or any higher than 14.4 volts could mean an alternator problem. Turn on the lights and the vehicle’s accessories and the voltage should stay up around 13 volts. An idle engine up to 2000 RPM will have the voltage of around 14 or so. (Testing numbers are for 12 volt systems, numbers can be easily determined, depending on what volt system you have).
Although, if you voltage goes up to 14.2 volts, then you need no alternator repair.
Here at Widnes Autoelectrics, we can test your alternator for you, saving you the time and effort of doing so. Plus if we find a fault with it during our tests, we’ll determine the cause of the fault and will either repair the fault or fit your vehicle with a brand new alternator. To find out more or if you’d like to book your vehicle in for testing and any possible repairs, then please get into contact with us here.

Faulty elecrical motors operate intermittently, or not at all. It can be particularly frustrating if the components gradually slow down, stop functioning altogether, then suddenly start working again, only to fail again the very next day. There are a few simple fixes to eliminate this annoying cycle. By doing as many of these as you can, you will avoid having to dismantle and reassemble your motor over and over again, which is time-consuming and difficult to do.
Instructions
Repairing electical motors is a lot harder than you would expect it to be and obviously consumes quite a bit of time. If you don’t have the time to do this yourself or it has gone straight over your head, then please get into contact with us and we’ll solve the problem for you and at a low cost too!
When looking for faults in your vehicles wiring, there are hundreds of places to check. Although there is no definitive “how to” for electrical fault finding in vehicles, but faults are the symptoms of the problem you are trying to find. You have to dig a bit deeper than what you can see and ask yourself questions about it. “Is it a minor or major item?” such as a bulb, fuse, radio, starter motor etc. What are the circumstances, was it working last night when you switched it off but not this morning? What’s the weather like? Has it developed the fault after a period of use whilst driving? Or could any secondary action such as moving something under the bonnet or in the engine compartment have upset something?
Minor items are things such as bulbs and fuses, although fuses may blow because of something serious.
Replace the fuse with a new one, which you know to be in good condition. If the fuse blows again there’s something wrong with the circuit. Don’t put a new fuse in again until you’ve had a go at discovering what the fault is. Fuses are very fragile when they haven’t been used for a while. You switch on and they get heated up by a sudden rush of current higher than they normally take and they’ll blow.
If you haven’t got the right equipment to do the above, but you have a lot of fuses lying around, then you could unplug parts of the circuit and replace the fuse again to find the fault, through process of elimination.
Bulbs usually won’t blow unless their time is up. As with a fuse they are at their most fragile when cold. A bulb blowing can take a fuse with it but it shouldn’t happen the other way around. One occasion where a bulb might blow that isn’t due to age is if the regulator has gone faulty. If a bulb or a number of bulbs keep needing to be replaced then check the voltage with the engine running, if it’s much over 13.5V you have a problem.
Serious items are more or less anything else in the car such as the battery, generator, regulator, relays, wipers, fans etc. Most of these have a mechanical element to them which can cause the fault (brushes in motors, linkages etc.). A wipers motor will try manfully to turn the wipers even when the mechanism is getting on for solid. It will draw more and more current until eventually fuses repeatedly blow.
If you don’t have the correct tools, knowhow and expertise to do this sort of testing for your vehicle, or you just don’t have the time. Then get into contact with us to see what we can do for you, our friendly, expertly trained and professional mechanics can sort out almost any problem with a vehicle, so you can have it back on the road in no time! To get into contact with us click here.
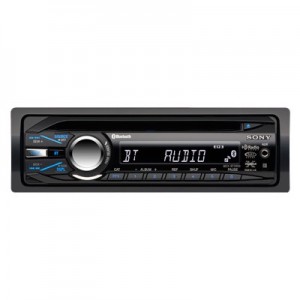
When this happens and nobody has maliciously tampered with it, it can be very annoying. To overcome this issue, you would need to locate the serial number of your vehicle (usually found on the bottom chassis of the car) or in any documentation that you got when you purchased your car. This code would then be entered into our database and the correct 4 digit pin would appear, once this has been entered into your radio, your car radio will be working again.
Although this is a very simple procedure, a lot of mechanics and companies try to milk as much money from you by saying you need to buy a number of different things. Here at Widnes Autoelectrics, we will tell you what you need to do/ what we need to do straight, with no hidden extras. If you have a problem with your vehicles electronics and you don’t know what to do or you don’t have the time to fix them, then you may want to get into contact with us to see what we can do for you and how much for. To get into contact with us for a free quote or to book an appointment please click here.

There are many different lights on the inside and the outside of your vehicle and at some point one/some of these may develop a fault.
Headlight Issues
If you are having issues with your headlights, or they have just stopped working completely your car cannot be on the road. Although these can be fixed in 4 steps.
Tail Lights
You can be flagged by a traffic officer if your car tail lights are broken, so don’t waste anytime fixing them. Read on to learn how you can fix your tail lights.
Engine Misfires are a common driveability problem that may or may not be easy to diagnose, depending on the cause. A misfiring cylinder in a four-cylinder engine is hard to miss. The loss of 25% of the engine’s power output is the equivalent of a horse trying to run on three legs (it’s just not going to happen!). The engine may shake so badly at idle that is causes vibrations that can be felt in the steering wheel and throughout the vehicle. The engine also may be hard to start and may even stall at idle, depending on the accessory load (examples; air conditioning, headlights and electric rear defroster etc.)
When misfire occurs, performance suffers along with fuel economy, emissions and idle quality and when a misfiring vehicle is subjected to an emissions test, it will usually fail because of the unusually high levels of hydrocarbons (GC) in the exhaust.
What exactly causes a cylinder to misfire? Basically it’s one of three things: loss of spark which is when the air/fuel mixture is too far out of balance to ignite or there’s a loss of compression. Loss of spark includes anything that prevents coil voltage from jumping the electrode gap at the end of the spark plug. Causes include worn, fouled or damaged spark plugs, bad spark plug wires or even a cracked distributor cap. A weak coil or excessive rotor gas inside a distributor would affect all cylinders, not just a single cylinder.
Lean misfire can occur when the air/fuel mixture is too lean (basically when there’s not enough fuel in the mixture) to burn. This can be caused by a dirty, clogged or inoperative fuel injector, this is where air leaks, or low fuel pressure because of a weak pump, restricted filter or leaky pressure regulator. Low fuel pressure would affect all cylinders rather than an individual cylinder, as would most air leaks. A leaky EGR valve can also have the same effect as an air leak. In fact, if a vehicle has one or more misfire codes and a P0401 EGR code, the fault is likely carbon build-up under the EGR valve.
Loss of compression means that the cylinder will lose most of its air/fuel mixture before it can be ignited. The most likely causes for this are a leaky (burned) exhaust valve or a blown head gasket. If two adjacent cylinders are misfiring, it’s likely the head gasket between them has failed. Also if an engine is overheating or losing coolant, it’s most likely that the head gasket is the culprit here.
Intermittent misfires are the worst kind to diagnose because the misfire comes and goes depending on engine load or operating conditions. They seem to occur for no apparent reason. The engine may only misfire and run rough when cold but then smooth as it warms up. Or it may start and idle fine but then misfire or hesitate when it comes under load. Also it may run fine most of the time but suddenly misfires or cuts out for no apparent reason.
If your engine is having similar problems the ones above, you may need to think about getting the engine serviced/repaired. Doing it earlier is much better than leaving it for the problem to worsen. You may be pleased to know that here at Widnes Autoelectrics we have the know-how, the tools and the experience to get your vehicle up and running again. Our friendly, professionally trained and professionally equipped mechanics will be able to help you with almost any problem. To find out what we can do for you, or you’d like a free quote or even to book an appointment with us, then please don’t hesitate to get into contact with us, you can do this by clicking here.

Component Repair, Expert Servicing and Testing
Drivers of older diesel cars often choose the more economical option of having their pumps or injectors repaired. However, diesel technology can be quite challenging when it comes to diagnostics and repairs, that is why the repair of diesel components requires high-grade test equipment, special tools and above all, precision and the expertise of diesel specialists.
At Widnes Autoelectrics we are perfectly equipped for mechanical diesel technology. Our state of the art diagnostic equipment enables our technicians to fully examine electronic control systems and determine if they are functioning correctly. We take great pride in offering the highest standard of workmanship and friendly advice. Our rates are highly competitive but without compromising the quality of work that we carry out for you.
If you need your diesel components testing or you already know they are faulty due to previous testing, then please get into contact with us to see what exactly we can do for you and for a free quote, if you need one. To get into contact with us please click here.